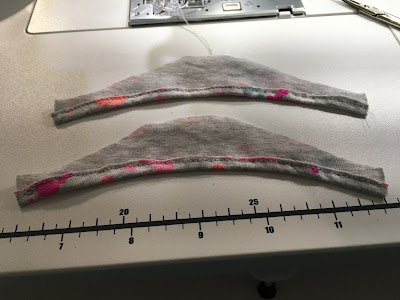
I took a few minutes to read the pattern instructions and they are well written. I wish I could sew the necklines like Cinnamon does but I can't. Hence why I am doing this tutorial of how I do it.
Cutting Out the Pattern
When using leggings, you need to cut off the hems and waistband. Then you cut off the seam allowances to get your fabric. For a t-shirt, I use the torso part of the leggings leaving the legs for leggings.
I try to lay the fabric on the grain as best I can. I use the outside seam (fold) to help me. One side of the torso is for the front and sleeves.
The other side is for the back.
I talk to myself when cutting out so I remember to cut on the pencil lines at the neck and center back seam.I also cut 2 - 1" wide strips of fusible knit interfacing for the center back seam.
Pressing the Pieces
I press the small pieces to get the wrinkles out and then press the interfacing to the back seam. I cut off the remaining bits of interfacing at the top and bottom.
At the Machine
I can choose between two feet for 1/4" seam allowances.
I chose the one on the left as it does not have the little edge which hinders me on curves. I also have use the main foot for my machine when necessary.
I put in a new needle (Microtex 12/80) and I'm ready to sew.
Sewing the Shoulder Seams
One of the little things I learned years ago was to sew the shoulder seams from the shoulder to the neck on both sides. Your machine is pulling the fabric the same way for both shoulder seams. I also don't finish a lot of the seams when sewing knits as I don't sell my doll clothes and knits don't fray. I do serge the back seams to hold the interfacing in place though.
If you finish the seams using a serger, serge before you sew. You can also use pinking sheers for a nice finish. If you choose this method, cut out the pattern using them.
The Neckline
I changed the foot to the main one when sewing a basting line around the neck. I like the wider foot to help hold the fabric but it isn't necessary. The distance is 3/8" from the cut edge.
I fold the neckline down on the line at the shoulder seams and then fold from that point to the back seam. Pin in place. Next I pin the center front and work towards each shoulder seam. The pins are on the right side as that is the side you will top stitch on.
I use a stitch length of 3.0 and slowly stitch around the neckline a good 1/8" from the edge. I remove the pins carefully. I adjust the neckline to keep its shape while I sew so it won't stretch out of shape.
When I checked the underside, I saw an oops. I carefully picked out that spot and redid it carefully.
I trimmed back the excess fabric close to the stitching line. I use duckbill scissors but you can use regular scissors as I did until I found the duckbill ones in a drawer of quilting stuff.
The Sleeves
The process for the sleeves is the same as the neckline. Baste a line 3/8" from the bottom edge, turn under and stitch closer to 1/8". Trim off the excess fabric and give a good press.
I didn't do any more as my phone was almost dead and needed recharging. It was enough for one day also.
More tomorrow.
Happy Doll Sewing......................................


No comments:
Post a Comment