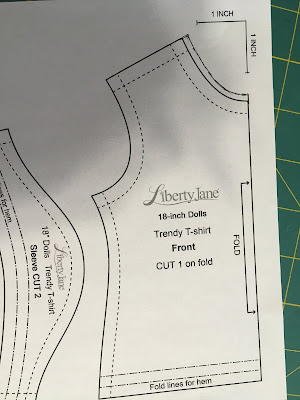
I squeezed in adjusting the pattern yesterday afternoon. The job isn't a big one, it takes a few minutes to do after you print the pattern.
For this job, you need a pencil and a ruler. I have a ruler that shows 1/16" marks and have had it for years. I use cheap mechanical pencils. I've used them for years. A vinyl eraser is a must if you need to erase. All these items I buy in late summer when they go on sale for school.
Step 1 - The Front
Draw a line 1/8" extending the center front line and the shoulder cutting line. Using your ruler draw small dashes 1/8" from the neck line. I have the ruler at an angle for the most accurate marking.
Join the lines together as smoothly as possible. I find the closer the little dashes are the easier it is to connect them smoothly.
Step 2 - The Back
Draw a line 1/4" from the center back cutting line. Extend the lines from the shoulder and hem cutting lines.
Draw the dots from the neckline 1/8" away as you did on the front piece.
Draw the dots together at the neckline.
Step 3 - the Sleeve
I didn't do anything to this sleeve though I drew a line to extend it. Ignore those extended lines. If you want a straight sleeve, you can draw a straight line across the sleeve with no extension. I did that with the previous pattern. This time I'm going with the curved sleeve.
You are now ready to rough cut your pattern out. I do that just before I lay the pattern out on the fabric.
Next time, we will cut out the pattern and begin to sew it. You will need knit fabric, and some light weight interfacing. I use a fusible knit interfacing. My fabric will be a pair of children's leggings. Set up your sewing machine and serger if you have one.
Happy Doll Sewing................................


No comments:
Post a Comment